Chocolate and Butter Chumbley Victoria Sponge
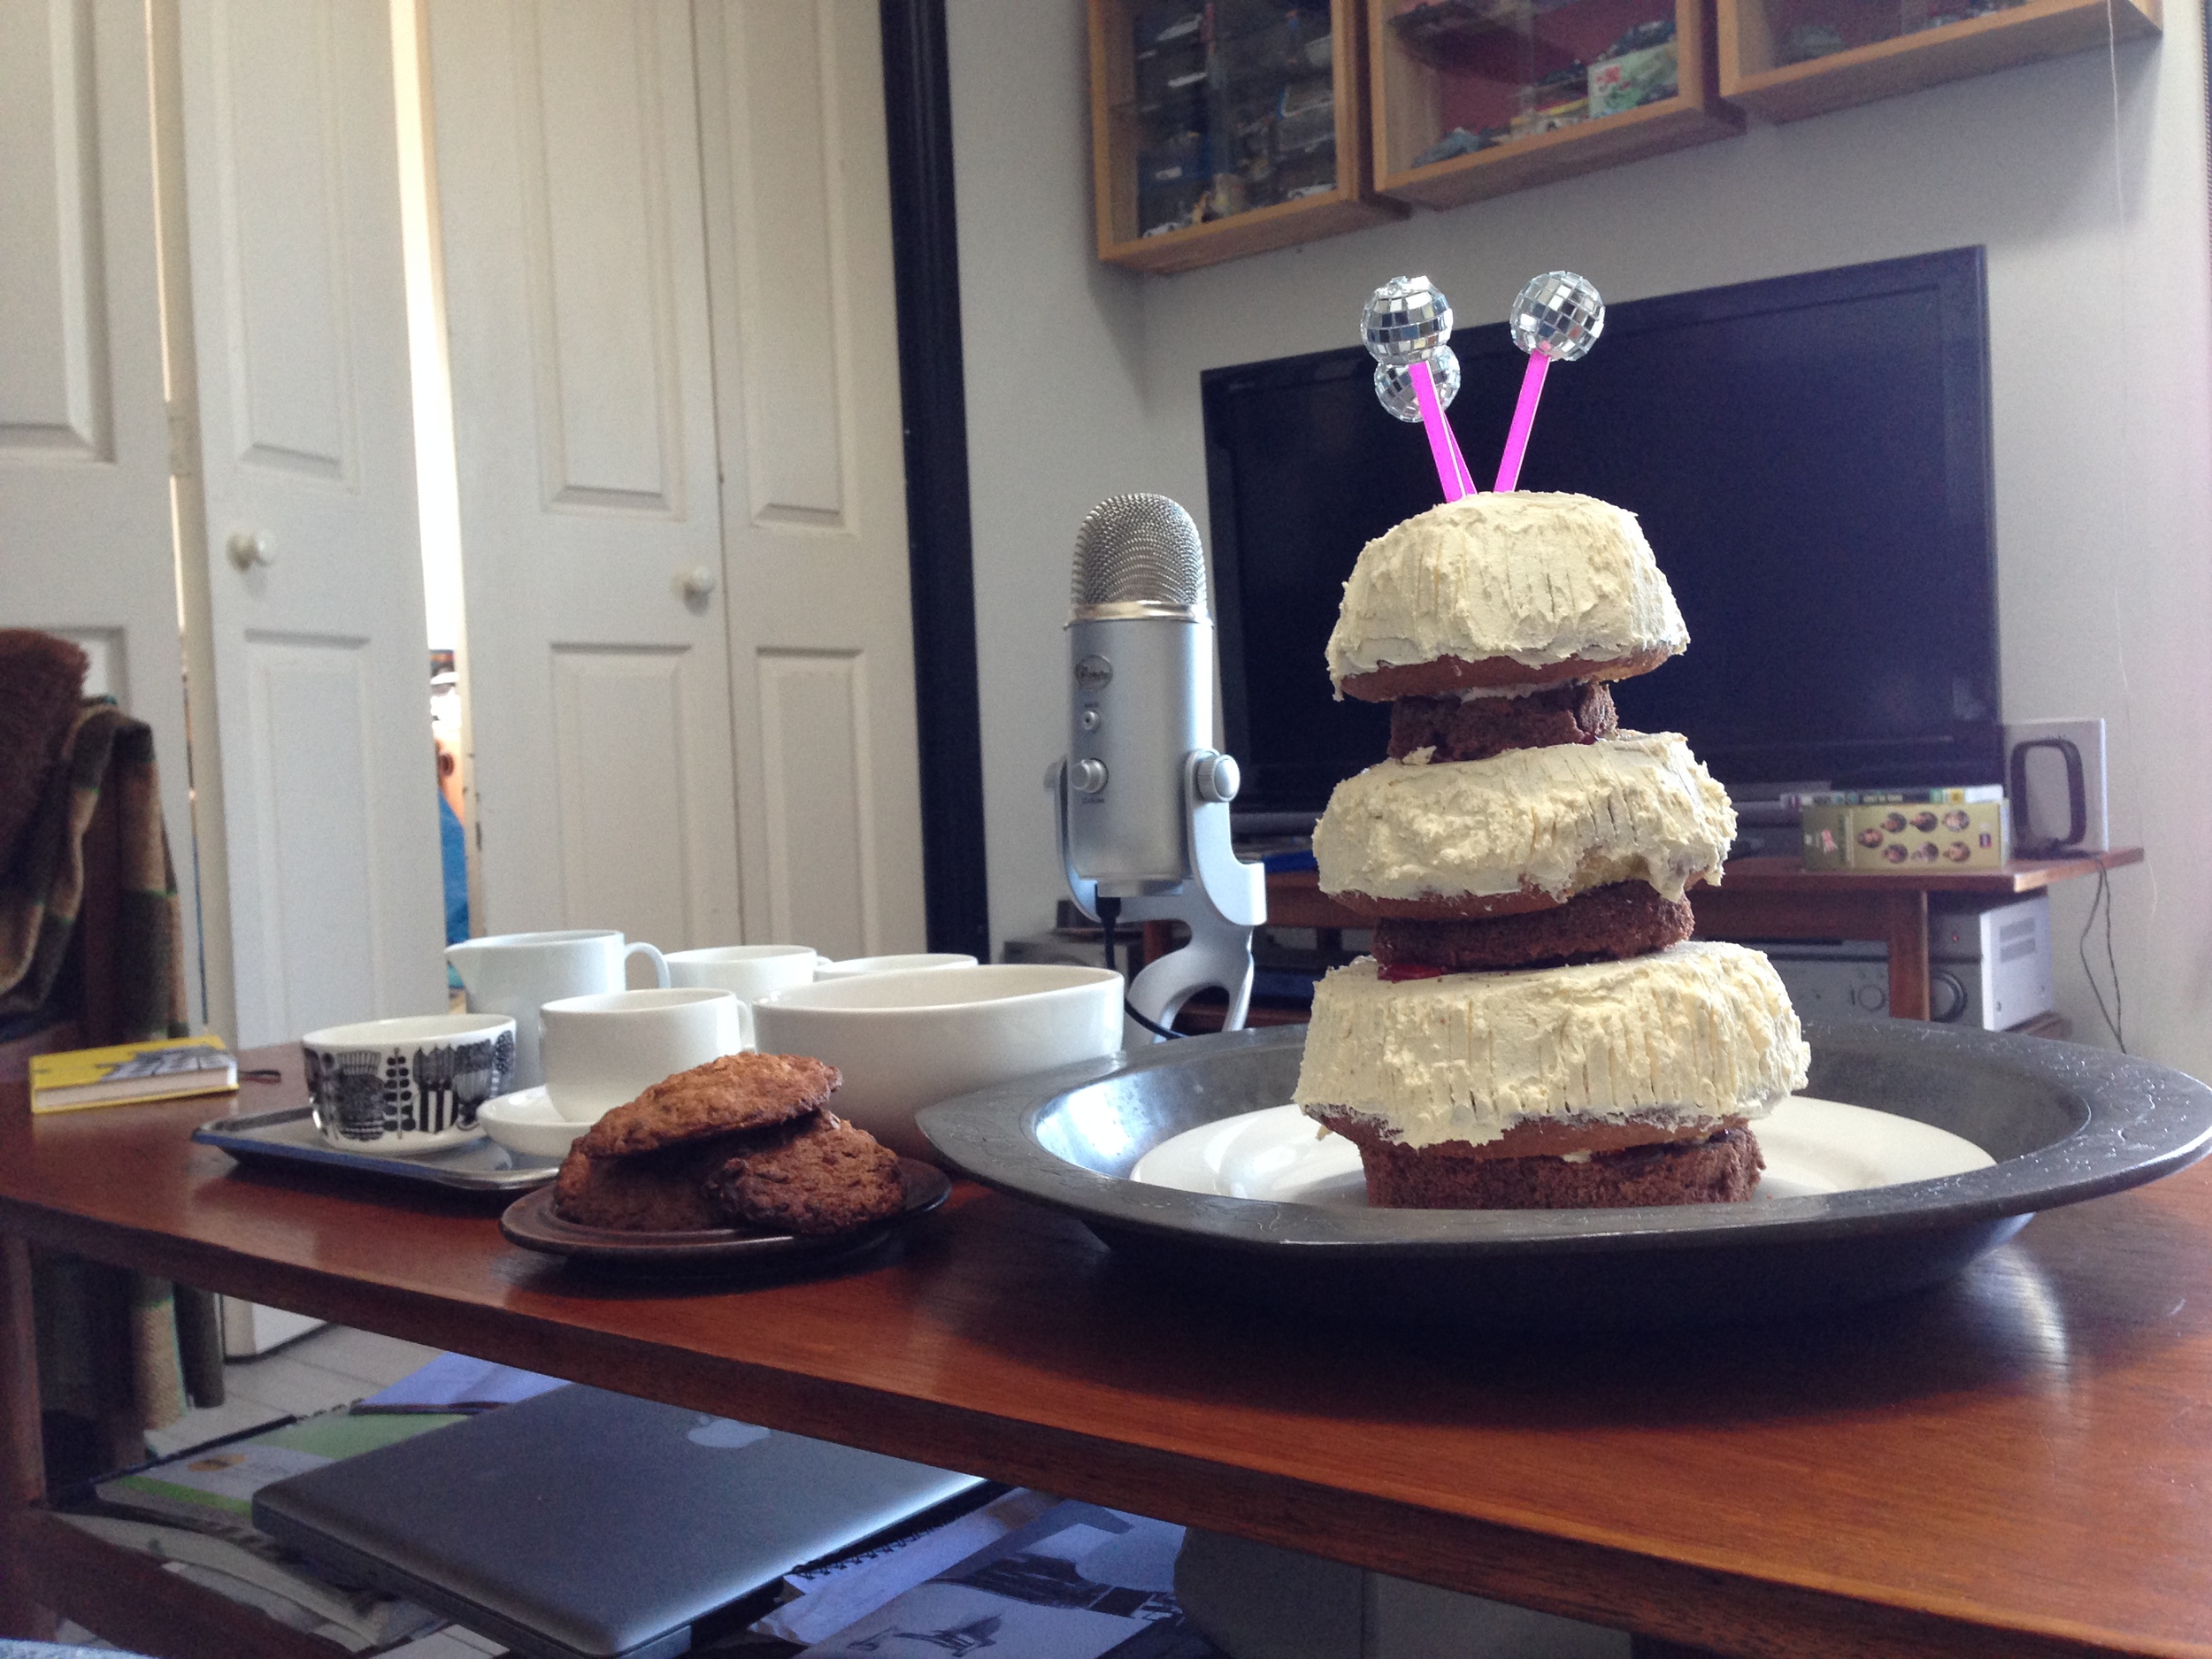
Served during the recording of Episode 6: Nipples, Dear Listener
Ingredients
The Butter Sponge
- 400 g caster sugar (1¾ cups)
- 400 g softened butter
- 8 eggs
- 400 g self raising flour (3¼ cups)
- 2 tsp baking powder
- 4 tbsp milk
The Chocolate Sponge
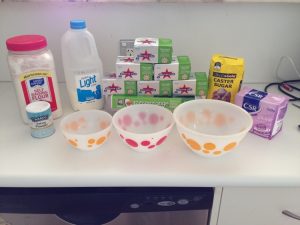
- 200 g caster sugar (½ + 1/3 cups)
- 200 g softened butter
- 4 eggs
- 200 g self-raising flour (1½ cups, plus a tbsp)
- 1 tsp baking powder
- 2 tbsp milk
- 4 tbsp cocoa
The Buttercream Icing
- 300 g softened butter
- 420 icing sugar, sifted (3 1/3 cups)
- vanilla extract, to taste
- Butter, flour and cocoa for greasing
- A jar of jam, for assembly
You’ll need two mixing bowls (including the bowl of the electric mixer), three oven–safe bowls of decreasing sizes (please refer to picture), and two 20cm cake tins. Remove the butter from the fridge about 20 mins before you start.
Method
The Butter Sponge
(You may want to do this in two batches: just use half the ingredients at a time)
- Preheat oven to Fan 170°C.
- Crack eggs into mixer bowl, add sugar, and beat on high setting for about six minutes (you want them to double or triple in volume).
- While the eggs are beating, chop the butter into small cubes, about 1 cm in dimension (in space).
- Sift the flour and baking powder together. Sift again to aerate the flour.
- When the eggs have increased in volume, reduce to a low speed and add the butter.
- Add the flour a half cup at a time. Scrape the sides of the bowl as necessary, and mix until smooth. It will seem lumpy for a bit — just keep mixing!
- Grease your three oven safe bowls with butter, and dust with flour.
- Divide the cake batter between the three bowls, leaving 1-2 cm at the top to allow for rising.
- Place bowls in the middle of the oven. Bake for 20–40 minutes. The time depends on the size of your bowls.
- Use a skewer or knife to test the smallest sponge after 20 minutes. When it comes out clean, it’s ready. If it isn’t ready, check again in 5 minutes.
- Remove the sponges as they cook, and place them on a heat resistant surface to cool. When the smallest one is ready, the middle one will still need another 5-10 minutes; when the middle one is ready, the large will still ned another 5-10 minutes.
- When all three are out of the oven, leave them to cool for 10 minutes, then turn them out onto a cooling rack.
- If your sponges have ballooned out of the bowl, feel free to trim them flat. It will help with the cooling process.
The Chocolate Sponge
- Follow steps 1–6 above, adding the cocoa spoon by spoon in step 6. Taste: if it’s not chocolatey enough for you, add more cocoa, because you’ve already come this far with that much butter.
- Grease the two cake tins with butter and dust with cocoa.
- Place in oven for 20 minutes. These ones should be ready at that time as they’re shallower, but test with a knife or skewer and adjust time as needed.
- Turn oven off, remove cakes, and leave them to cool slightly before turning them out onto wire racks.
- When all the sponges are cool, place them on plates, loosely cover them with cling film and put in the fridge, preferably overnight. The wrap helps to keep them moist, and the chilling firms them for assembly. It is important that the cakes are cool before covering, so that steam is not trapped inside, making the cake soggy.
The Buttercream Icing
(When you are to assemble your Chumbley, make the buttercream.)
- Chop the butter into cubes again, and beat in mixer at a high speed until butter is creamy.
- With the mixer still running, add the icing sugar gradually, followed by the vanilla extract.
- Beat until very pale yellow in colour, and like whipped cream in consistency. Set aside at room temperature.
Assembly

- If you haven’t trimmed the bowl sponges yet, now is the time. Arrange your bowl sponges in a stack, taking note of the overhangs. The top of each section of a Chumbley is roughly the same circumference as the bottom of the section above it, so depending on your bowls, you may want to trim the tops off the lower two cakes. When finished trimming, put the bowl sponges to one side.
- Cut three circles of the chocolate sponge to form the Chumbley’s supports. Each circle should be smaller than the bowl sponge that will go above it.
- Assemble the cake roughly: large chocolate sponge circle, large bowl sponge, medium chocolate sponge circle, medium sponge, small chocolate sponge circle, small sponge.
- Trim any cakes which are uneven, in order to level out the layers.
- When you are happy with the levels, assemble cake on your serving plate. Use a spoon of jam to secure the bottom layer, then build up. Use a small amount of jam and butter cream between each layer to cement the layers together.
- Using two spoons, smooth the remainder of the buttercream over the bowl sponge sections of the Chumbley. If the spoons get sticky, warm them with hot water. When you are happy with your coverage of buttercream, lightly rake a fork down the side to achieve that distinctive texturing effect that Chumblies have.
- Decorate with three antennae of your choosing.